Chrono::Blender is an add-on for the Blender modeling and rendering software. With this add-on, you can generate high quality photo-realistic animations of Chrono simulations.
Use of the Chrono::Blender requires that you build the Chrono::Postprocess module, so that you can use the ChBlender class to export all Chrono visual assets into .py files in a directory when you run the simulation. For each time step, a .py file will be generated.
Then you can open Blender, import those files from the File/Import../Chrono menu, and you will find all the Chrono assets being imported in the GUI of Blender. At this point, you can modify the objects, add lights, cameras, effects, perform high quality rendering, videos, etc, as regularly done via the Blender GUI.
Overview
This is a short overview of the main features of the add-on. If you want to test the following features on your PC, first you must do these steps:
- install the add-on in Blender
- if not yet enabled, turn on
CH_ENABLE_MODULE_POSTPROCESSin CMake and build Chrono - build demo_POST_ (also, look at the comments in the source demo_POST_blender.cpp in order to learn)
- run demo_POST_blender.exe
After the executable has run, you will find new files in the subdirectory '/DEMO_OUTPUT/BLENDER', residing in your executable directory. Those files are:
- exported.assets.py, this file contains all the global settings such as render size etc., plus the definition of all assets that are persistent during the simulation, i.e. shapes that do not change from time step to time step, and that are saved only once for performance reasons.
- output, a directory containing state00001.py, state00002.py, etc. that are files containing information on the position of assets at each time step, plus the definition of assets that are non-persistent, i.e. shapes that change from time step to time step.
- anim, a directory that will be used optionally for storing .png or .jpg files after an animation has been rendered in Blender.
You can enable this type of postprocessing also in your own projects: if you look in demo_POST_blender.cpp you can learn how. It is quite simple. The Blender postprocessing is capable of converting many of the Chrono visual assets into Blender objects, stored in .py files, without much programming effort.
Load the simulation in Blender
- open Blender
- use menu File/Import../Chrono_import
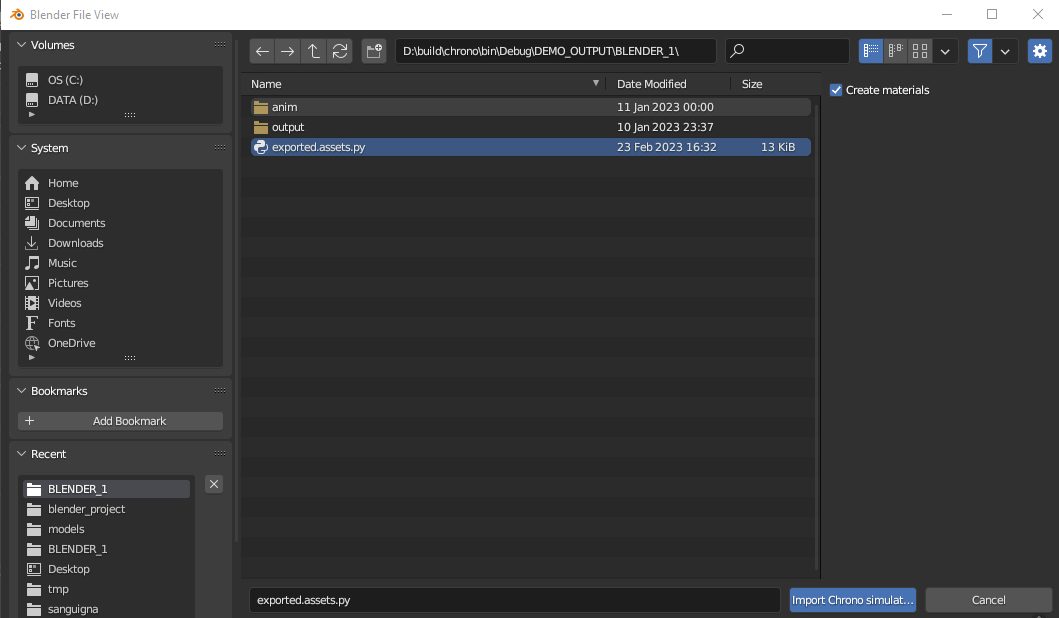
- select the exported.assets.py file that you generated with the Chrono executable
- you will immediately see the objects in the Blender 3D view:
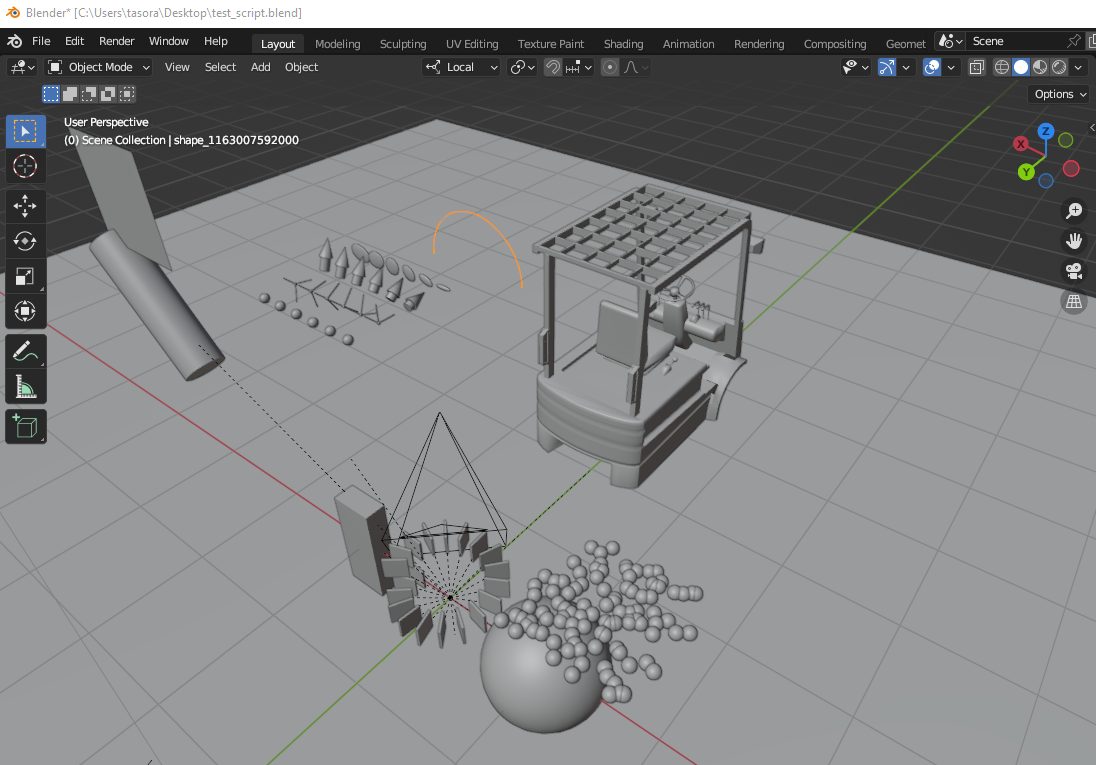
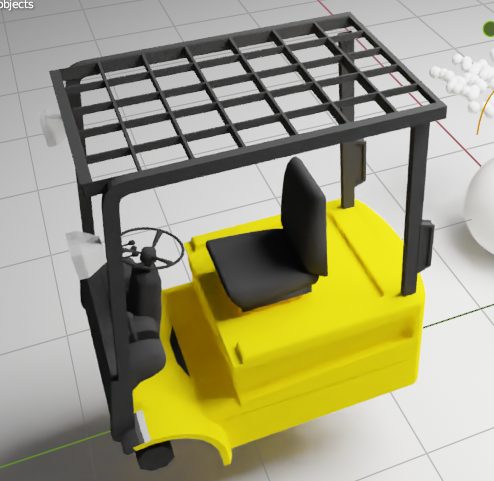
- now move to the right-left the time slider: you will see that objects move in the 3D view (in this demo, some small spheres will fall to the ground).
 What is happening under the hood? Basically, each time Blender changes the frame number, the corresponding file stateNNNNNN.py is load). This means that you can render animations in Blender.
 - in the upper right part of the 3D view there is a set of icons for changing the Viewport shading: the default Solid mode is not fit to show fancy colors and textures, so let's switch it to Rendered mode clicking on the corresponding icon:

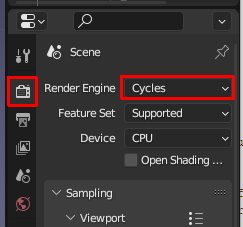
- useful hint: the default renderer in Blender is Evee, which is very fast but not photorealistic, i.e. you can use for large scale simulations like you could do with Paraview etc., but if you aim at the maximum photorealism, we suggest to enable the Cycles renderer, which can be done as in the following figure:
- At this point you should be able to see something like this:
 Note how you can add additional cameras, objects, etc. as for regular Blender scenes. For example in this demo we added an area light source from the top, like a large softbox, with 1800W of power.
Editing Chrono objects
Is it possible to add details to the meshes that were saved from Chrono? Is it possible to change their colors or their textures? This is possible directly from the Blender GUI, in many cases.
- first, let's study how the Chrono simulation is translated into the Blender objects: look at the Outliner panel, its View layer list will show something like this:
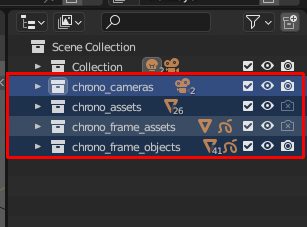 You will notice four collections:
- chrono_cameras contains videocameras generated by the Chrono exporter, if you used this feature, otherwise contains nothing. The cameras contained inside this collection can NOT be edited
- chrono_assets contain assets like meshes that do not change during the simulation. These objects can be edited, textured etc. as you like!!!
- chrono_frame_assets contain assets like meshes that will change during the simulation. These objects can NOT be edited
- chrono_frame_objects contain objects to be rendered and visible in 3D view: those are instances to assets contained in chrono_assets or in chrono_frame_assets. The idea is that one might have a simulation of 100 identical parts (i.e. 100 ChBody objects that share the same ChVisualShape, in the .cpp source), so it is wise to create one mesh in Blender and share it among 100 instances with different positions and rotations. This concept is automatically managed by the Postprocess module of Chrono and by the Blender add-on. These objects can NOT be edited.
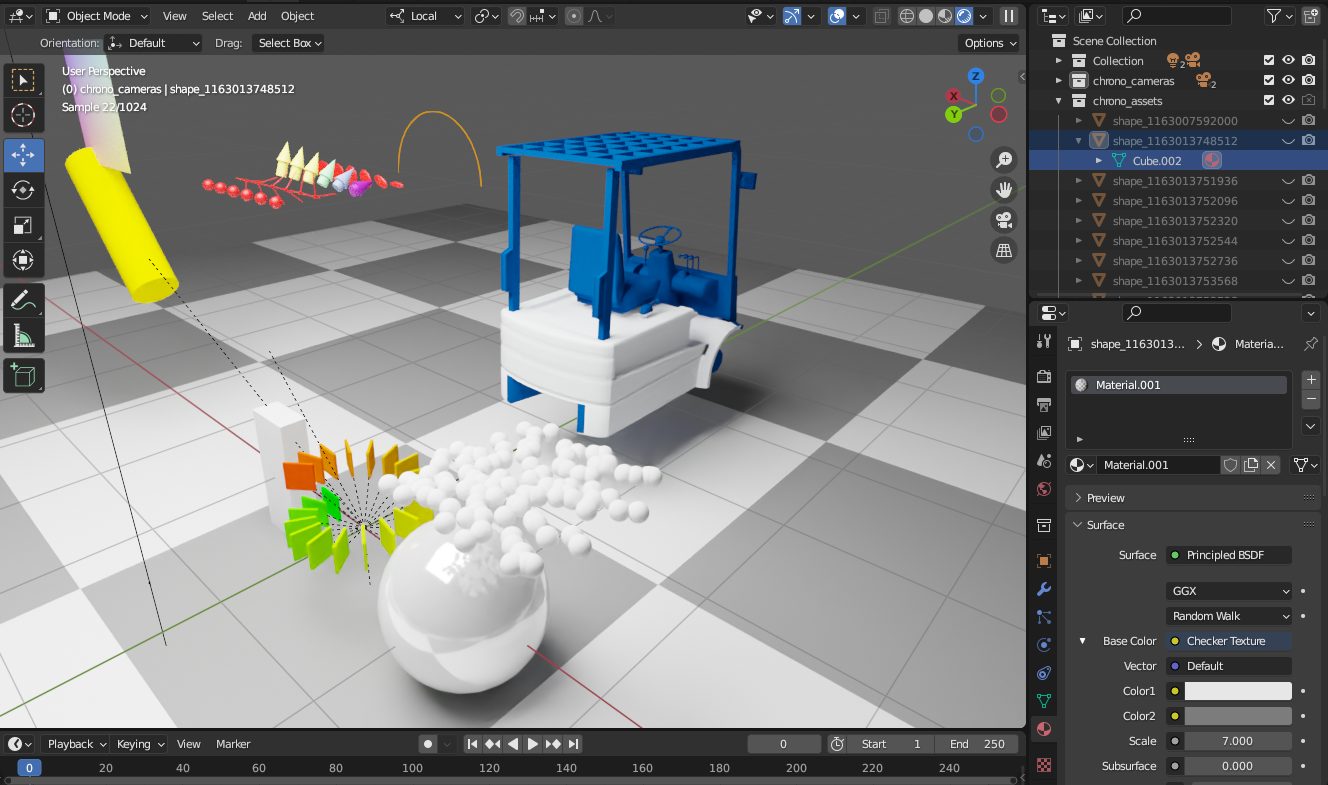
- suppose that we want to change the texture of the floor, that is saved from Chrono and not something that we added via the Blemder modeler GUI. A first thing is to click on it: an object will be selected in the chrono_frame_objects. In our case is the object called "Object". click to expand its subtree: you will see that this object is an instance of the asset called shape_xxxxxxxxx where xxxxxxxxxxx is a unique identifier. Now, find shape_xxxxxxxxx in the chrono_assets collection and click on its icon.
- at this point you can edit the asset, for example here we deleted the blue material that was exported from Chrono, and we attach a new material to generate the grid effect:
 (Note: at the time of writing, this change is not persistent through time steps if you edit an asset that had a material/color assigned also from the Chrono side. A workaround is to disable Chrono materials -see later-, or just do not assign a material from the Chrono side)
The Chrono view settings
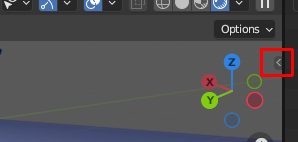
- open the side tabs of the 3D view by clicking on the small arrow on the right border of the view:
- now you can click on the Chrono vertical tab, and you will see the panel for changing the view settings of Chrono objects:
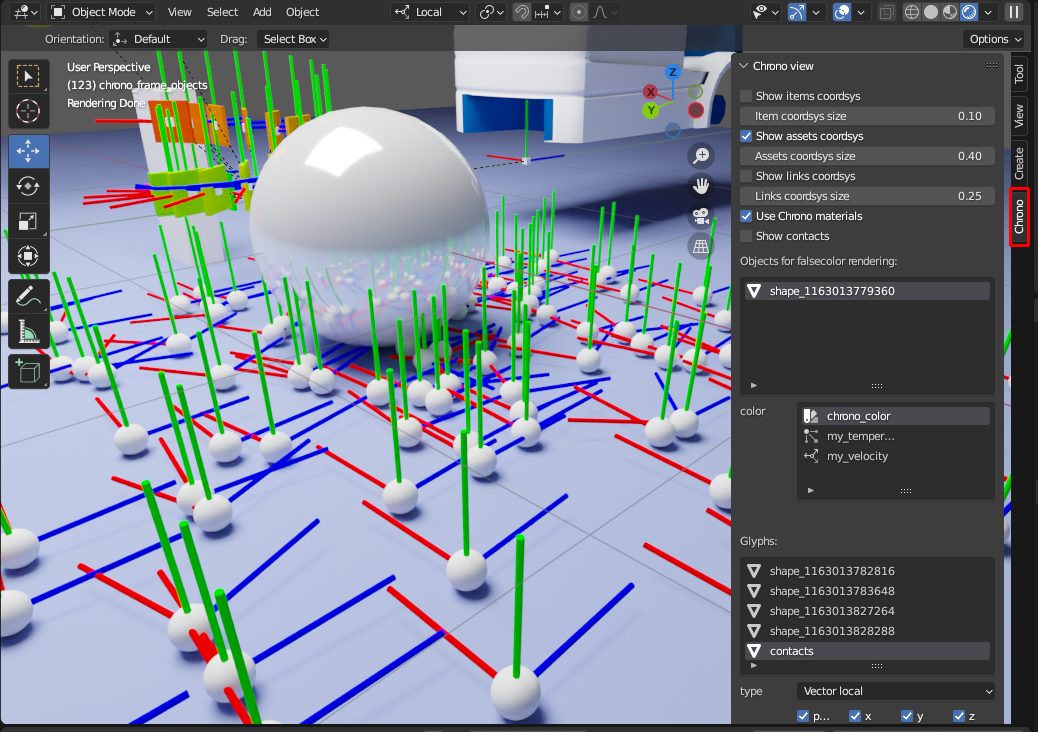
- In the picture above, we enabled the Show assets coordsys option, for example, so we can see where are the x,y,z axes of all assets. We can also change Assets coordsys size to find a proper size for those axes.
- We can do the same by enabling the display of coordinate systems of links, and of items (where item is: a ChBody, or a particle (body instance) in a ChParticleCluster, etc.)
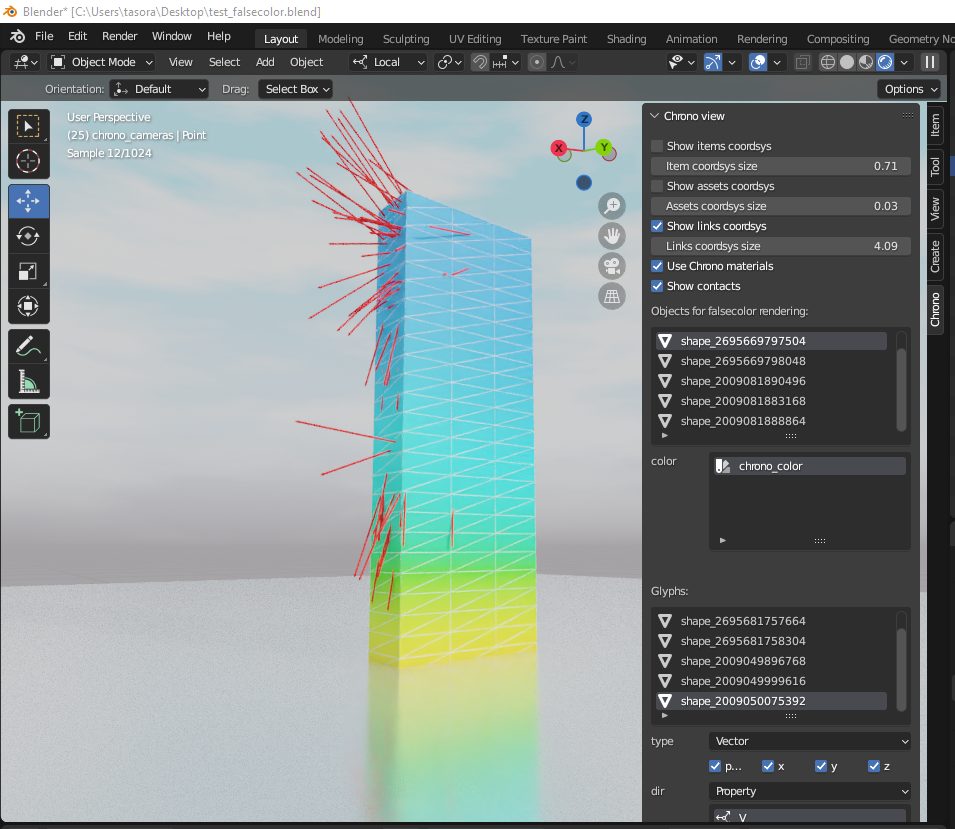
- We can show contacts by enabling Show contacts. Note that we can change the appearance of the arrows representing the contact forces:
- scroll down in the Chrono view settings and, in the Glyphs box, select contacts
- you see that you can change many properties of the arrow glyphs:
 For example we set width as constant, 0.04, and length as Property, where the property is the vector set F that is, the contact force (with some scaling factor). This doing, we have arrows of same thickness, but whose length depends on how strong is the contact force. Note that we could have preferred an alternative way, that is setting all contact arrows with the same length, but with width depending on the F property. Or both.
 - an interesting possibility is about controlling the color of the arrow glyphs, according to some property. There is a predefined set of falsecolor colormaps, use the Min, Max and colormap settings to see the effects.
- by the way: maybe you want to display contacts via dots rather than with arrows. This can be done if you change the type setting, from Vector local to Point. For points, you can control the width and the color: for both you can have a constant value or something depending on a property (the F vector, in this case)
Other features and caveats
- PBR materials assigned via C++ from the Chrono side are translated in principled BSDF materials in Blender. If there are textures assigned to color, bump, roughness, etc., those are managed too.

- OBJ files are imported correctly, also when there are multiple materials assigned.
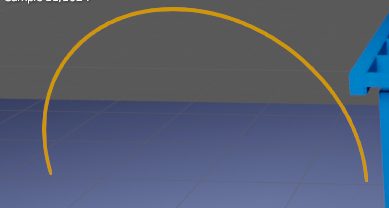
- ChLineShape objects (arcs, splines, etc) are supported too, and will render as thin tubes:
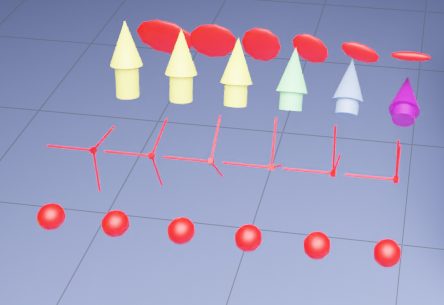
- ChGlyphs are fully supported, in the sub types: points, coordsystems, vectors, tensors.
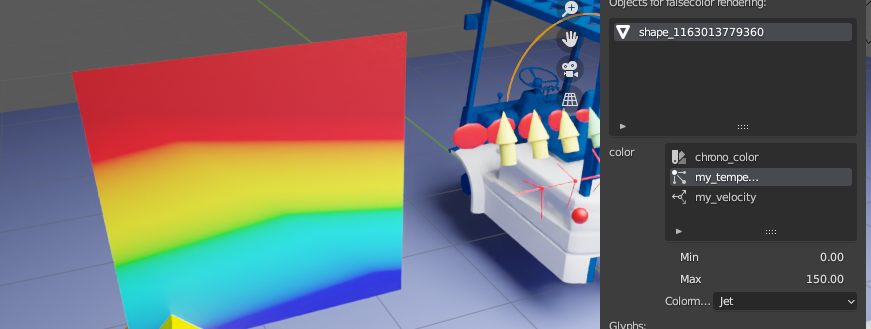
- ChTriangleMeshConnected that have some vector/scalar/tensorial property attached, can be optionally rendered with falsecolor colormaps for the desired property:
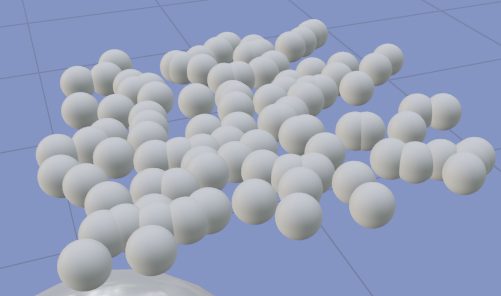
- ChParticleCloud objects are supported, with special attention to performance. This is the preferred way to render simulations with a very large number of identical objects. We could render particle clouds with hundreds thousands of shape instances (regardless of the complexity of the sample shape) in short times.
NOTE!!! speaking about performance: at the time of writing, if you export scenes with more than 100 objects of ChBody type, the add-on starts to be slow, in the sense that it takes a lot of time to delete Blender objects to go to the next time step, and to allocate the new Blender objects. This is not an issue with the add-on: the bottleneck is a known problem in Blender, that takes lot of time when allocating/deallocating many objects. For the moment, the workaround is to try using the ChParticleCloud object (that is super fast) whenever it is possible, i.e. when you have identical copies of objects. We hope to resolve this inconveninence in future.